If you want to keep your car’s air conditioning running smoothly, knowing how to use Orion Motor Tech AC gauges is a must. These gauges help you check the pressure in your AC system quickly and accurately.
By learning how to use them, you can spot problems early and save yourself from costly repairs. This guide will walk you through every step, making it simple and clear. Ready to take control of your car’s AC maintenance? Let’s dive in and get started!
Choosing The Right Gauge
Choosing the right Orion Motor Tech AC gauge is essential to get accurate readings and maintain your vehicle’s air conditioning system effectively. Picking a gauge that suits your specific needs can save you time and prevent costly mistakes. Before you make your choice, consider the types of gauges available and whether they fit your vehicle’s requirements.
Types Of Orion Ac Gauges
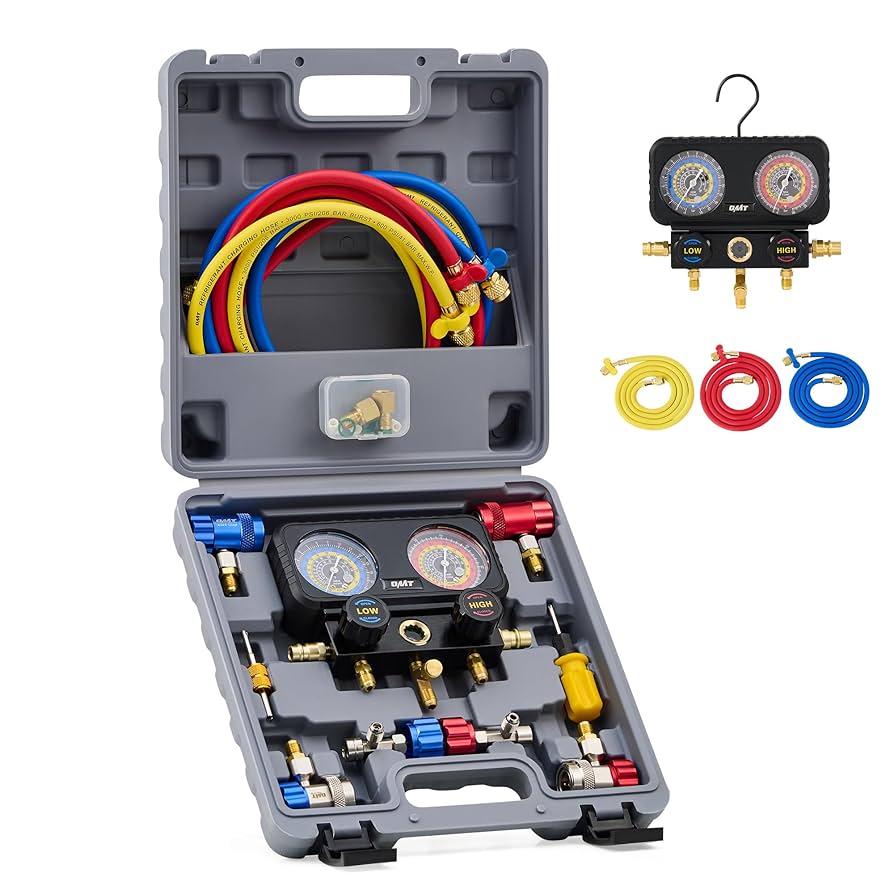
Orion Motor Tech offers several types of AC gauges, each designed for different purposes. The most common are:
- Analog Gauges:These provide clear, easy-to-read measurements and are great for quick diagnostics.
- Digital Gauges:Known for precision, digital gauges offer detailed readings and often include backlit displays for use in low light.
- Manifold Gauge Sets:These combine multiple gauges and hoses, allowing you to measure both high and low pressure simultaneously.
Knowing the difference helps you decide what type fits your comfort level and the complexity of your AC system work.
Gauge Compatibility With Vehicles
Not every gauge works with every vehicle. Your car’s AC system might use R-134a refrigerant, while older models could require R-12. Orion gauges are often labeled with the refrigerant type they support, so check this carefully.
Also, consider the connection type. Your vehicle’s AC service ports should match the gauge fittings to ensure a secure and leak-free connection. Using an incompatible gauge can lead to inaccurate readings or damage.
Ask yourself: Does your gauge support the refrigerant and pressure range your vehicle uses? If not, you might end up guessing instead of knowing exactly what’s going on under the hood.

Credit: www.amazon.com
Preparing For Measurement
Preparing for measurement with Orion Motor Tech AC gauges is essential to get accurate readings and avoid any mishaps. Before you start, setting up the right environment and equipment can save you time and frustration. Let’s look at what you need to keep in mind to measure safely and effectively.
Safety Precautions
Safety should be your top priority. Always wear protective gloves and eye protection to guard against refrigerant exposure or accidental splashes. Never work on a running engine or a pressurized system without releasing pressure first.
Check for any leaks or damaged hoses before connecting the gauges. Avoid touching hot engine parts during measurement to prevent burns. Asking yourself, “Am I fully protected and aware of the risks?” can prevent careless mistakes.
Required Tools And Equipment
- Orion Motor Tech AC gauges set:Includes manifold gauge, hoses, and adapters necessary for most vehicle systems.
- Refrigerant identification:Know the type your vehicle uses (R134a, R1234yf, etc.) to match your gauge specifications.
- Service manual or vehicle guide:Helps identify correct pressure ranges and connection points.
- Leak detector or soap solution:Useful for spotting leaks before and after measurement.
- Basic hand tools:Screwdrivers or wrenches may be needed to access service ports.
Having these tools at hand makes the process smoother and avoids unnecessary stops. Have you ever started a job only to realize you’re missing a key tool? Preparing fully prevents that hassle.
Connecting The Gauges
Connecting your Orion Motor Tech AC gauges correctly is essential for accurate readings and effective diagnostics. If the gauges aren’t attached properly, you risk inaccurate data or even damage to the AC system. Let’s focus on the exact spots where you connect and how to secure the manifold gauges safely.
Locating Service Ports
First, identify the service ports on your vehicle’s AC system. These ports are usually capped and located on the larger and smaller diameter pipes coming from the compressor. The low-pressure port is often found on the larger line, while the high-pressure port is on the smaller line.
Check your vehicle’s manual if you’re unsure where these ports are. Remember, using the wrong port can cause damage or false readings. Have you ever connected to the wrong port? It’s a quick way to waste time and get frustrated.
Attaching The Manifold Gauges
Once you locate the service ports, remove the caps carefully without forcing them. Attach the blue hose to the low-pressure port and the red hose to the high-pressure port. Make sure the connections are tight to prevent refrigerant leaks.
Hold the gauge manifold steady while connecting the hoses to avoid bending or damaging the fittings. It’s a good idea to check the O-rings on the hose ends before attachment; worn O-rings can cause leaks and affect readings. Have you checked your hoses for wear before? This small step can save you a lot of trouble.

Credit: mayte.com
Reading Pressure Levels
Reading pressure levels with Orion Motor Tech AC gauges is simple and essential. Understanding these numbers helps you check your car’s air conditioning system. It tells you if the system works well or needs fixing.
The gauge shows pressure on two sides: high and low. Each side has different normal ranges. Knowing what these numbers mean can save time and money.
Interpreting High And Low Side Readings
The low side measures pressure in the evaporator. It usually shows lower pressure than the high side. High side measures pressure in the compressor and condenser. It handles higher pressure in the system.
Low side pressure too low means a possible refrigerant leak or blockage. High pressure on the high side may mean a dirty condenser or overfilled system. Both readings must balance for proper AC function.
Check the gauge after the AC runs for a few minutes. Watch how the needles move. Sudden changes can indicate system problems. Use the readings to decide if a professional check is needed.
Normal Pressure Ranges
| Side | Normal Pressure Range (PSI) |
|---|---|
| Low Side | 25 to 45 PSI |
| High Side | 200 to 250 PSI |
These ranges can change with temperature. On hotter days, pressure tends to rise slightly. Always check your vehicle’s manual for exact numbers. Use these ranges as a basic guide for most cars.
Diagnosing Ac System Issues
Diagnosing AC system issues with Orion Motor Tech AC gauges gives you a clear snapshot of your vehicle’s cooling health. These gauges measure the pressure inside the system, helping pinpoint where problems might be hiding. Understanding the readings can save you time and money by identifying the root cause before you replace parts blindly.
Common Pressure Problems
Pressure readings that are too high or too low usually signal trouble.
- High pressure:Could mean the condenser is dirty or the cooling fan isn’t working properly.
- Low pressure:Often indicates low refrigerant levels or a blockage in the system.
Checking both the high and low-pressure sides with your Orion gauge helps you confirm if the system is balanced. If you see abnormal pressure, think about what could cause it—dirt, worn parts, or leaks.
Identifying Leaks And Blockages
Leaks make your AC system lose refrigerant, reducing its cooling power. Your Orion gauges can reveal leaks by showing a pressure drop when the system is off.
Blockages, on the other hand, restrict refrigerant flow and cause uneven pressure. If the low side pressure is very low and the high side is very high, a blockage might be the culprit.
Try this: connect the gauges, turn the AC on, and watch how the pressure behaves. Does it stay stable or fluctuate wildly? Fluctuations often mean leaks or restrictions.
Maintaining Your Ac Gauges
Maintaining your Orion Motor Tech AC gauges is key to getting precise readings every time. Proper care extends the life of your gauges and keeps them working well. Simple upkeep routines ensure the tools stay reliable for all your AC system checks.
Cleaning And Storage Tips
Always clean your AC gauges after use. Use a soft cloth to wipe off dirt and dust. Avoid harsh chemicals that might damage the gauge surface. Keep the hoses clear by blowing air through them gently. Store the gauges in a dry place away from direct sunlight.
Use the original case or a padded container for storage. This protects the gauges from impacts and moisture. Do not coil hoses tightly; let them rest naturally to prevent cracks. Regular cleaning and proper storage help avoid damage and maintain gauge accuracy.
Calibrating For Accuracy
Check your gauges regularly for accuracy. Calibration ensures the pressure readings are correct. Use a known pressure source or take the gauges to a professional calibration service. Compare the gauge reading to the standard pressure and adjust if needed.
Calibration intervals depend on how often you use the gauges. Frequent use may require calibration every six months. Less frequent use may allow for yearly checks. Accurate gauges prevent mistakes and save time during AC maintenance.
Troubleshooting Gauge Errors
Dealing with gauge errors on your Orion Motor Tech AC gauges can be frustrating, especially when you rely on them for accurate readings. Understanding the root of these errors helps you fix problems faster and avoid unnecessary replacements. Let’s look at some common mistakes and signs that your gauges might need to be replaced.
Common User Mistakes
One frequent error is not calibrating the gauges before use. Calibration ensures the readings are accurate, so skipping this step can lead to false measurements.
Another mistake is improper connection of hoses and fittings. If the connections are loose or swapped, the gauge won’t read correctly and might show erratic results.
- Using the wrong type of refrigerant for your gauge set can cause inaccurate readings and damage the gauge.
- Not zeroing the gauge before starting the test can also lead to errors, making it hard to trust the results.
- Ignoring maintenance, such as cleaning the gauge or checking for leaks, often results in faulty performance.
Have you ever had a gauge that just wouldn’t settle on a pressure reading? It might be due to one of these simple mistakes rather than a broken gauge.
When To Replace Gauges
Even with proper use, gauges wear out over time. You should consider replacing your Orion Motor Tech AC gauges if you notice persistent issues that calibration and cleaning don’t fix.
Look out for:
| Sign | Reason | Action |
|---|---|---|
| Needle stuck or slow to respond | Internal mechanical damage or debris | Replace gauge immediately |
| Inconsistent readings across tests | Calibration not holding or damaged sensor | Test with a new gauge to confirm |
| Visible damage or cracked lens | Physical damage affecting accuracy | Do not use; replace |
Think about how much time and effort you spend troubleshooting. Sometimes, investing in a new gauge saves more trouble than trying to fix an old one. Your gauges are only as good as their accuracy—don’t settle for less.

Credit: www.amazon.com
Frequently Asked Questions
What Are Orion Motor Tech Ac Gauges Used For?
Orion Motor Tech AC gauges measure your vehicle’s air conditioning system pressure. They help diagnose AC issues and ensure proper refrigerant levels. Using these gauges can prevent costly repairs and maintain AC efficiency.
How Do I Connect Orion Motor Tech Ac Gauges?
Connect the hoses to the high and low-pressure service ports on your vehicle’s AC system. Attach the gauges securely and ensure no leaks. Follow the gauge’s manual for exact port locations and connection steps.
Can Orion Motor Tech Ac Gauges Detect Refrigerant Leaks?
Yes, these gauges can help identify refrigerant leaks by showing abnormal pressure readings. If pressures are too low or inconsistent, it often indicates a leak or system malfunction.
How To Read Pressure Levels On Orion Motor Tech Ac Gauges?
Read the high and low-pressure values on the gauge dials while the AC runs. Compare readings to manufacturer specifications to assess system health and refrigerant charge status.
Conclusion
Using Orion Motor Tech AC gauges is simple and effective. Follow the steps carefully for accurate results. Regular checks keep your AC running smoothly. These gauges help diagnose issues quickly. They are essential tools for any vehicle owner. Proper maintenance extends your AC’s lifespan.
Enjoy reliable performance and comfort on the road. With practice, you become familiar with the gauges. Get the most out of your AC system. Your vehicle deserves the best care. Keep it cool and efficient all year round.